Showing posts with label Paper. Show all posts

Thursday, February 10, 2011

All *Wrapped Up*

OK. So first of all – 2011 resolution update. Doing so-so on the marathon hopes. I got training partner. Unfortunately, we have only trained one time together. But, I’m up to 6 miles without much strain. I hoping by the summer races that I will be in good shape.  
Doing much better on the skiing pledge. So far this season, I’ve hit up Whistler, Baker, Crystal, Mammoth, Big White and Revelstoke. Revelstoke is the big winner – great mountain, friendliest people and all and all an awesome trip. The season still has a lot of skiing left to be done and hope to hit up a couple more hills. Suggestions?
Blogging has fallen a bit by the way side. Funny how you can’t type while skiing or running…
This week I’ve gotten back to some activities around the only holiday that lets you freely decorate in pink: Valentine’s Day.  
Overall, I am not a Valentine’s Day fan. For the couples, do you really need a holiday to tell someone that you love them? That should be done daily. Well, I guess boys need the occasion to express themselves. :)
For singles, this holiday might as well be called “Throw salt in my wounds” day or "I have awesome friends" day. 
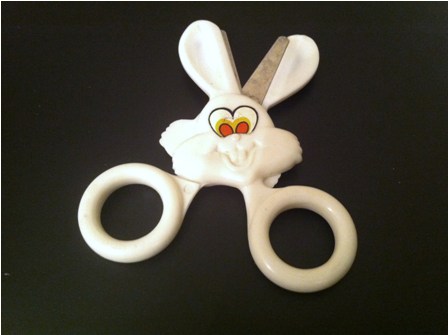
For either group, it is a good chance to take a trip back to the 3rd grade a do a little decorating with paper. I even whipped out my elementary school bunny scissors for the night.
Playing with paper doesn’t always mean cards made with doilies or eating paste.
I used the occasion to wrap some small tokens for the special people in my life. Some red card stock and a little wire mirrored a Chinese food delivery box. Woven ribbon topped pink wrapping paper. Finally, in a throwback to Mrs. Moore’s placemat project, I wove 1 inch x 1 inch strips of paper to create a quilted gift box.
Seem like too much effort? Don’t worry. These boxes can be used year after year.     
FYI, perfect soundtrack for your V-day craft night : Country Strong Soundtrack.  Yep, that’s right. I now like country music. Still “eh” on Gwyneth Paltrow.

Sunday, January 16, 2011

Merci, Grazie, Danke, Obrigado, 謝謝, Спасибо, Thanks...

My mom stressed good manners on me. One of her lessons that carried over is the thank you note. I’m admittedly a little behind on my notes for Christmas gifts. So I took a little time during the Jets-Pats game to catch up. (Sidebar: Tom Brady, if you or Giselle ever read this blog, keep the long hair. It gives you personality. Also, you are not Capt. America.)


My thank you notes have a winter theme this year. Maybe, because I have snow on my mind. I used snowflake printed papers and kept the color theme to cool blues, silvers and whites. And no card is complete without a little sparkle. I added my special pixie dust (prisma ultra-fine glitter) with a little spray adhesive.

While I got some great things for Christmas, lots more to be thankful for that presents in New Year. I am blessed to be surrounded by wonderful people in my life… and a couple crazy schnauzers.  

Sunday, September 26, 2010

Decorating with Books

Cicero said, “A room without books is like a body without a soul.”  

Books are a wonderful way to add character and depth to shelves, bookcases, tables. I recently moved into my “Barbie Dream House” (more on that later…) and found myself with fantastic white built-in in my office space.

Challenge? How to display books. The books I had on hand were mismatched, didn’t fit my color scheme and frankly, I’m not sure if “The Age of Turbulence” by Alan Greenspan or “In Life, First You Kick Ass: Reflections on the 1985 Bears and Wisdom from Da Coach” by Mike Ditka are really “display worthy.” Well, let’s all agree those titles don’t fit the “Barbie Dream House” mystic. 

Solution: book covers. The covers can be as simple of as brown craft paper or as fancy as designer wallpaper. A consistency in color theme is the key. I chose a variety of handcrafted green papers and Cavallini wrapping paper from the Paper Source. 

To make the cover… first take yourself back to jr. high and covering your 7th grade science book in a paper grocery bag. Now that you are mentally set, select the book you are ready to cover.

·        Lay the book flat on in the center of the paper. Gently fold the paper around the book. Make sure you have at least a 2 inches border on the top and bottom of the spine. Allow the paper to extend 3-4 inches past the front and back cover of the book. Rule of thumb is to select a paper that is 3 times as long as the book you are trying to cover.
·        Place the book in the center of the paper.
·        Wrap the paper up until is touches the bottom of the book and mark. Fold edge, making a sharp crease. Repeat with top edge.
·        Fold the left edge about 3 inches in. Make a crease.
·        Slip the front cover of the book into the pocket created.
·        Fold the remaining paper around the back cover of the book and make a crease. Insert the back cover of the book into the pocket.
·        Admire your work!